Mastering Remote IoT Web SSH with Raspberry Pi: The Ultimate Guide
Remote IoT web SSH with Raspberry Pi is a powerful tool that allows users to manage their devices from anywhere in the world. This technology bridges the gap between physical devices and remote access, offering endless possibilities for innovation. Whether you're a hobbyist or a professional, understanding how to set up and manage remote IoT systems using Raspberry Pi is essential.
With the growing demand for remote management and IoT solutions, Raspberry Pi has become a popular choice due to its affordability and versatility. This tiny yet powerful device can be configured to work as a secure SSH server, enabling users to control their IoT devices remotely through the web.
In this comprehensive guide, we will delve into the world of remote IoT web SSH using Raspberry Pi. From setting up your Raspberry Pi to configuring SSH and implementing web-based access, this article covers everything you need to know. Whether you're a beginner or an advanced user, you'll find valuable insights and practical tips to enhance your skills.
Introduction to Remote IoT Web SSH with Raspberry Pi
The concept of remote IoT web SSH with Raspberry Pi is transforming the way we interact with devices. By combining the Internet of Things (IoT) with secure shell (SSH) technology, users can remotely manage their devices through a web interface. This setup is particularly useful for monitoring and controlling IoT devices from anywhere in the world.
Raspberry Pi serves as the backbone of this system, providing a cost-effective and flexible platform for IoT enthusiasts. Its compatibility with various operating systems and software makes it an ideal choice for remote access solutions. By leveraging SSH, users can ensure secure communication between their devices and the remote server.
Why Choose Raspberry Pi for Remote IoT?
Raspberry Pi offers several advantages for remote IoT applications:
- Cost-effective hardware
- Highly customizable
- Compatible with Linux-based operating systems
- Large community support
Raspberry Pi Overview
Raspberry Pi is a series of small single-board computers developed by the Raspberry Pi Foundation. These devices are designed to promote the teaching of basic computer science in schools and developing countries. However, their versatility has made them popular among hobbyists and professionals alike.
Key features of Raspberry Pi include:
- Compact size
- Low power consumption
- Multiple GPIO pins for hardware interfacing
- Support for various programming languages
Popular Models of Raspberry Pi
There are several models of Raspberry Pi available, each catering to different needs:
- Raspberry Pi 4 Model B
- Raspberry Pi 3 Model B+
- Raspberry Pi Zero W
Setting Up Your Raspberry Pi
Before diving into remote IoT web SSH, it's essential to set up your Raspberry Pi properly. This involves installing an operating system, configuring network settings, and ensuring your device is up to date.
Step 1: Install Raspberry Pi OS
Download the Raspberry Pi Imager tool and select the latest version of Raspberry Pi OS. Write the image to an SD card and insert it into your Raspberry Pi.
Step 2: Configure Network Settings
Ensure your Raspberry Pi is connected to the internet. You can use either a wired connection or Wi-Fi, depending on your setup.
Updating Your Raspberry Pi
After installation, update your Raspberry Pi to ensure you have the latest software and security patches:
- Run
sudo apt updateto update the package list. - Run
sudo apt upgradeto upgrade installed packages.
Configuring SSH on Raspberry Pi
SSH (Secure Shell) is a network protocol that allows secure communication between devices. Enabling SSH on your Raspberry Pi is a crucial step in setting up remote IoT web SSH.
Step 1: Enable SSH
You can enable SSH by navigating to the Raspberry Pi Configuration tool or by creating an empty file named "ssh" on the boot partition of your SD card.
Step 2: Obtain IP Address
Find the IP address of your Raspberry Pi using the command ifconfig or ip addr. This address will be used to connect to your device remotely.
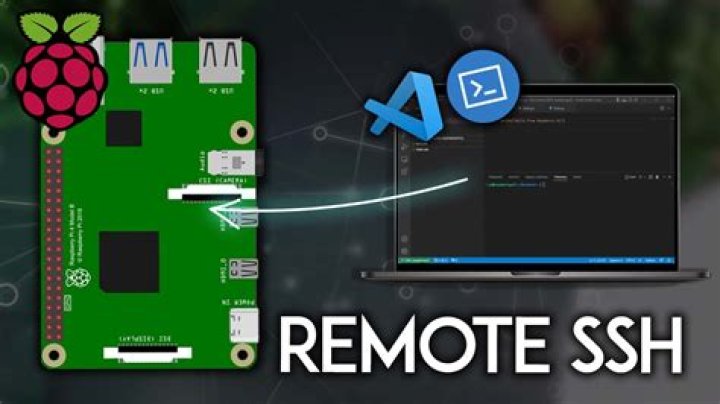
Connecting to Raspberry Pi via SSH
Use an SSH client like PuTTY (Windows) or the terminal (Mac/Linux) to connect to your Raspberry Pi. Enter the IP address and login credentials to establish a connection.
Securing Your Remote IoT Web SSH Connection
Security is paramount when setting up remote IoT web SSH. Follow these best practices to protect your system:
- Change the default password.
- Use public key authentication instead of passwords.
- Enable a firewall to restrict unauthorized access.
- Regularly update your Raspberry Pi OS and software.
Public Key Authentication
Public key authentication enhances security by eliminating the need for passwords. Generate a key pair using the ssh-keygen command and copy the public key to your Raspberry Pi using ssh-copy-id.
Enabling Web Access for Remote IoT SSH
To enable web access for your remote IoT SSH setup, consider using a web-based SSH client like WebSSH or SSH Web Terminal. These tools allow you to access your Raspberry Pi through a web browser, making it convenient for remote management.
Step 1: Install WebSSH
Install WebSSH on your Raspberry Pi by following the official documentation. This involves cloning the repository and setting up the necessary dependencies.
Step 2: Access WebSSH
Once installed, access WebSSH by navigating to your Raspberry Pi's IP address followed by the port number in your web browser.
Benefits of Web-Based SSH
Web-based SSH offers several advantages:
- No need for a dedicated SSH client.
- Accessible from any device with a web browser.
- Convenient for remote troubleshooting.
Troubleshooting Common Issues
Despite careful setup, issues may arise when configuring remote IoT web SSH with Raspberry Pi. Here are some common problems and their solutions:
- SSH Connection Refused: Check your Raspberry Pi's IP address and ensure SSH is enabled.
- Authentication Failed: Verify your login credentials and ensure public key authentication is set up correctly.
- Slow Connection: Optimize your network settings and consider using a wired connection instead of Wi-Fi.
Debugging Tools
Use tools like ssh -v to debug SSH connections and identify potential issues. Additionally, check your Raspberry Pi's logs for error messages.
Advanced Techniques for Remote IoT Web SSH
Once you've mastered the basics, consider exploring advanced techniques to enhance your remote IoT web SSH setup:
- Set up a dynamic DNS service for easy access.
- Implement port forwarding on your router.
- Use a reverse SSH tunnel for secure connections.
Dynamic DNS
Dynamic DNS (DDNS) allows you to access your Raspberry Pi using a domain name instead of an IP address. This is particularly useful if your ISP assigns dynamic IP addresses.
Real-World Applications of Remote IoT Web SSH
Remote IoT web SSH with Raspberry Pi has numerous real-world applications:
- Home automation systems
- Remote monitoring of industrial equipment
- Smart agriculture solutions
- Environmental monitoring
Case Study: Smart Home Automation
A smart home automation system using Raspberry Pi allows users to control lights, thermostats, and security systems remotely. By integrating SSH and web-based access, homeowners can manage their devices from anywhere in the world.
Conclusion and Next Steps
Remote IoT web SSH with Raspberry Pi offers a powerful solution for managing devices remotely. By following the steps outlined in this guide, you can set up a secure and efficient system for your IoT applications.
Take the next step by experimenting with advanced techniques and exploring new applications for your Raspberry Pi. Don't forget to share your experiences and insights with the community. Leave a comment below or check out our other articles for more tips and tricks.
References: